Filter By

Category

Category

Function

Function

Item

Item

Type

Type

Use on

Use on

Color

Color

Price

Price

  • €8.00 - €3,172.00

Left Banner

  • LeftBanner 1

Cee'd - Pro Cee'd I ED (06-12)

Kia Cee'd 1 ED | Tuning Accessories and Xenon LED Lights | QSPCARS

Active Filters

  • Color: Anodized Red
  • Color: Black PU Leder
  • Color: Translucent White
  • Color: Traslucent Black

There Are 11 Products.

Filter By

Category

Category

Function

Function

Item

Item

Type

Type

Use on

Use on

Color

Color

Price

Price

  • €8.00 - €3,172.00

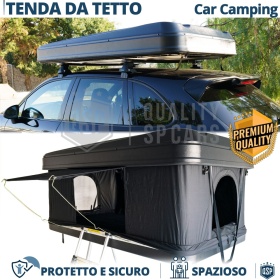
Rigid Car Roof Tent Installable on Kia Ceed Professional | 3...
COMPATIBILITY:

- It Can be Installed on Kia Cee'd, Pro Cee'd, with Roof Bars (already installed), with a Minimum Load Capacity of 90kg


- IF ROOF BARS HAVE A CAPACITY OF 90KG, CAN THEY SUPPORT THE TENT, WHICH WEIGHS 90KG + THE WEIGHT OF THE PEOPLE WHO WILL HOST IT?

The maximum weight capacity supplied when purchasing a pair of roof bars always represents the dynamic capacity of the bars, i.e. the maximum capacity of the same when the vehicle is moving, but all the bars, in addition to having a dynamic capacity, have a static capacity, which in most cases it is not reported on the bars.

The Static Capacity Represents the Maximum Weight Capacity of the Roof Bars with the Vehicle Stationary, and on average the latter Reaches Approximately X3 Times the Dynamic Capacity.


- CAN ALL CARS HOLD A ROOF TENT?

Absolutely Yes. The side members of each car are designed to support more than the weight of the car itself, since, in the event of an accident and the car overturning, for safety reasons, it must support its own weight.

Since the smallest of the cars weighs at least 1 Ton, by logic, it is obvious that any car (even the smallest!) can hold both the roof tent and its guests inside, without any problem.


ASSEMBLY:

- Place the tent on the roof bars of your vehicle (2 people min.)
- Under the tent there are 2 channels, insert 4 steel inserts crossed by the bolt for each channel
- Scrolling through the inserts equipped with bolts, match 2 bolts, one with the outside and one with the inside of the roof rack
- Mount the bracket supplied by gripping the part underneath the roof rack and tighten the bolts
- Remember to Tighten the Bolts Whenever You Travel.


OPENING:

- Press on the Steel Jack Closure Buckles that block the Closure Laces
- Accompany the automated opening upwards
- USEFUL ADVICE: We recommend leaving the door and window zips open for quick and easy opening and closing of the tent
- The closure occurs through long laces designed for draft from the ground


Although simple and intuitive FOR OPTIMAL ASSEMBLY, WE ALWAYS RECOMMEND THE INSTALLATION OF OUR ITEMS BY AN EXPERT
As we will not assume responsibility if the item is assembled and subsequently removed.
We trust in your common sense.
€2,442.44 Regular Price €3,172.00
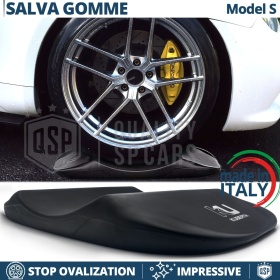
Black TIRE CRADLES Flat Stop Protector, suitable for KIA |...
COMPATIBILITY

KIA cars:

- with wheels between 14 inches and 23 inches
- with wheels of max diameter 750 mm
- Max weight 2,700 kg


APPLICATION: SEE THE VIDEO TUTORIAL By scanning QR CODE in Listing Images

- Place Easyrise in front of each wheel.
- Press on the gelpads to make them adhere correctly to the ground (if they do not adhere correctly, clean the gelpads with a degreaser and water).
- Perform a brief reverse motion to facilitate climbing onto the cushion.
- Climb onto the cushion with inertia without accelerating on the ramp.


We do not assume responsibility for: incorrect purchases - violations of regulations or laws of each state - damage that could be caused to you, to third parties, to the Vehicle or to the item itself, as we describe every single specification in detail.

We trust in your common sense.
€377.30 Regular Price €401.38
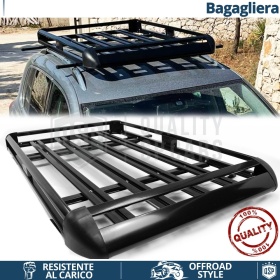
Car Roof Rack Basket Tray for Kia Cee'd, Rio | Travel Luggage...
COMPATIBILITY:

For KIA Cars, with Open Longitudinal HANDRAILS (See IMAGE Nr. 2):

- Cee'd - Pro Cee'd 1 ED (2006-2012)
- Rio 1 (2000-2005)


ASSEMBLY:

The Roof Rack Comes DISASSEMBLED (Instructions Inside the Package):

1) Join the different tubulars by means of special screws - bolts supplied
2) Secure the Roof Rack to the OPEN Longitudinal Handrails of the Car, using the 4x Screw-on Brackets

(ALTERNATIVELY - It can be mounted on any vehicle already equipped with roof bars, BUT it will be necessary to have suitable brackets or other systems for fixing between the luggage compartment and the roof bars)


Although mouting is simple and intuitive, FOR AN OPTIMAL MOUNTING, WE ALWAYS RECOMMEND THE INSTALLATION OF OUR ITEMS BY AN EXPERT.
As we will not take responsibility for the assembled and subsequently detached article.
We trust in your common sense.
€236.42 Regular Price €243.73
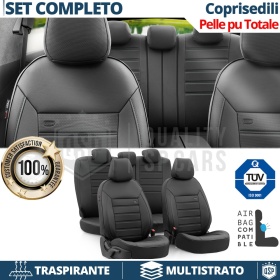
SEAT COVERS for Kia Ceed in Pu Leather PERFECT FIT, FULL SET Front + Rear | TÜV Certified
  • -5%
  • Out of Stock
SEAT COVERS for Kia Ceed in Pu Leather PERFECT FIT, FULL SET...
COMPATIBILITY:

ATTENTION to the Version, NO SEATING with: Armrest and Integrated Belts, Non-Removable Headrest, Ergonomic Sporting

- Suitable for Kia Cee'd, Pro Cee'd

(Eligible for Reclining Seats, Seats with Integrated AIRBAG, Rear seats with central armrest, Folding or Partially Folding Rear Seats)


ASSEMBLY:

" For a correct installation it is strongly recommended to always contact an expert in the sector "
" Some Stages may be slightly different, from Car to Car "


1) INSTALLATION OF FRONT SEATS
- Tilt the Backrest
- Place the appropriate cover on the Seat, aligning it as best as possible
- Bring the Elastics behind the Seat, passing them between the Back and the Seat
- Tighten and Fix the Side Elastics of the Seat between the Side Plastics of the Seat with the Help of a Flat Tip Screwdriver (or a similar tool)
- Make sure the Cover is Aligned Correctly with the Seat
- Tighten the elastics previously brought behind the seat and fix them under the seat, using the special metal hooks supplied
- Tension The Front Elastic Bands Of The Seat And Fix Them Under The Seat, Using The Special Metal Hooks Provided
- Repeat the operation on the Second Seat

2) INSTALLATION OF THE FRONT BACKREST
- ATTENTION: If the car has airbags, Make sure that the "Airbag" label of the seat and the seat cover are on the same side (to understand the exact cover of the driver and passenger seat)
- Remove the headrests
- Insert the Seat Cover on the Backrest and align it in the best way
- Bring the elastics of the front part behind the seat, passing them between the backrest and the seat
- Stretch the elastic bands from the back of the seat by pulling the end of the seat cover to which they are anchored, to give it a perfect adherence
- Fix the Elastics under the Seat, using the Special Metal Hooks Provided
- Make an X-shaped cut with scissors in the holes of the headrests and bring out the Plastic Arrangements, pushing the cut part under the Arrangements themselves
- Repeat the operation on the Second Backrest

3) HEADREST INSTALLATION
- Reinstall the Headrests in the Seat
- Slide the Hooded Cover over the Headrest and Line it up

4) REAR SEAT INSTALLATION
- Remove the Rear Seat Cushion (most cars are set up to Release the Rear Seat)
- Insert the seat cover on the seat and align it in the best way
- Tension and Fix the Elastics in Opposite Way to each other under the Seat, using the Special Metal Hooks Provided, trying to keep them as parallel as possible
- For a perfect look it is necessary to always align each end of the seat cover with the seat itself (e.g. corner to corner, top edge to top edge)

5) REAR BACKREST INSTALLATION
- Remove the headrests
- Insert the seat cover on the backrest, under the seat belts, and align it in the best way
- Lower the Backrest
- Bring the elastics of the front part behind the seat, passing them between the backrest and the seat
- Stretch and Fix the Elastics in Opposite Way Behind the Back, using the Special Metal Hooks Provided, trying to keep them as parallel as possible
- If the car is equipped with folding rear seats, lower the zip at the joint and partially fold the backrest
- By lowering the backrest, you will have access to the unfinished side: add the side covers by closing the zip on both unfinished sides
(Attention: The two Side Covers Are Attached to each other by an Elastic; if necessary, detach them with a cut)
- Tighten and Fix the Elastics of the Side Covers Behind the Back, using the Special Metal Hooks Provided
- For a perfect look it is necessary to always align each end of the seat cover with the seat itself (e.g. corner to corner, top edge to top edge)


(Although Simple and Intuitive, ASSEMBLY BY AN EXPERT IN THE SECTOR IS ALWAYS RECOMMENDED, TO AVOID POSSIBLE DAMAGE TO THINGS OR PEOPLE. WE ALWAYS RECOMMEND NOT DO IT YOURSELF)
€220.19 Regular Price €231.78
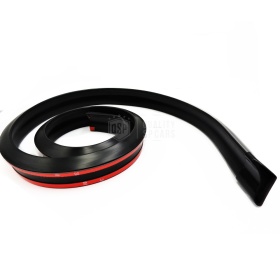
Rear SPOILER Compatible with KIA adhesive, for Trunk / Roof...
COMPATIBILITY:

- KIA

It is applicable on any vehicle: Cars, SUVs, Trucks. Perfect adaptability.


ASSEMBLY:

- Wash and thoroughly clean the surface where the spoiler is to be applied

- Remove the 3M adhesive film, and adhere the spoiler to the desired part

- Cut off excess parts

- Apply the two terminal parts in Thermal ABS supplied

(For a perfect fit, use a thermal body dryer)


FOR OPTIMAL MOUNTING, EVEN IF SIMPLE REPLACEMENT, WE ALWAYS RECOMMEND THE INSTALLATION OF AN EXPERT, as we do not assume responsibility for articles mounted and subsequently detached. We trust in your common sense.

€46.33 Regular Price €47.28
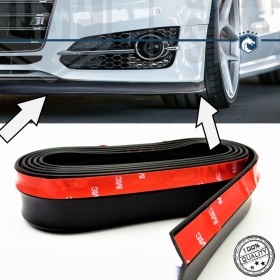
Adhesive SPOILER Compatible With KIA, Bumper Lip or Side Skirt...
COMPATIBILITY:

- ALL KIA

It is applicable on any vehicle: Cars, SUVs, Trucks. Perfect adaptability.


ASSEMBLY:

- Wash and thoroughly clean the surface where the spoiler is to be applied

- Remove the 3M adhesive film, and adhere the spoiler to the desired part

- Cut Posteriorly in large curvatures to facilitate folding

- Cut off excess parts

- Apply the supplied screws

(For a perfect fit, use a thermal body dryer)


FOR OPTIMAL MOUNTING, EVEN IF SIMPLE REPLACEMENT, WE ALWAYS RECOMMEND THE INSTALLATION OF AN EXPERT, as we do not assume responsibility for articles mounted and subsequently detached. We trust in your common sense.

€39.60 Regular Price €40.00
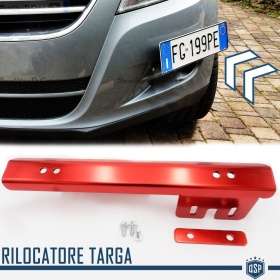
Front License Plate Holder for Kia, Side Relocator Bracket, in...
COMPATIBILITY:

- For KIA Cars

It is applicable on any vehicle with an indentation on the bumper, where it will be possible to fix the bracket (WATCH PHOTO).


ASSEMBLY:

- Put the relocation plate holder where you want to apply it, marking the points where you will need to pierce the bumper

- Once the holes have been made, fix the plate holder with the metal plate and the bolts supplied

- Remove the plate and apply it on the new relocation plate holder (1 hole may be required on the plate)


FOR OPTIMAL MOUNTING, EVEN IF SIMPLE REPLACEMENT, WE ALWAYS RECOMMEND THE INSTALLATION OF AN EXPERT, as we do not assume responsibility for articles mounted and subsequently detached. We trust in your common sense.

€23.25 Regular Price €23.49