4/5
549 reviews
Filter by
Item
Type
Color
Price
Filter

Left Banner

  • QSPCARS LED and Car Accessories Left Banner

Give us your feedback!

What do you think of our shop? Tell us all about it!


Seat Covers

 Leather Car Seat Covers

SEAT COVERS

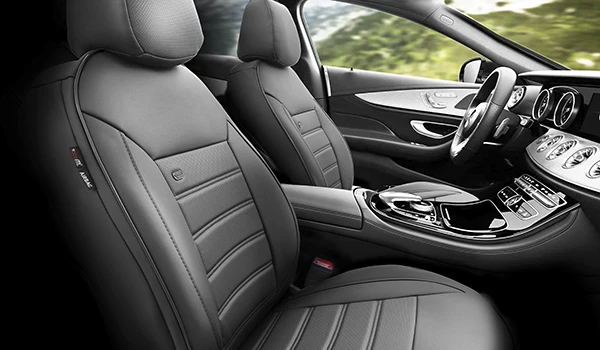
QSPCARS x OTOM Seat Covers Offer More Advantages:

  • Perfect Fit
  • Aerofit Technology, Universal
  • Air Bag Compatible
  • TÜV Certified

Choose Between Fabric or Leather and Completely Renew the Car Interior.

The Result of a Careful Installation is Equal to a Real Seat Cover.

PERFECT FIT Car Seat Covers | QSPCARS
SEAT COVERS for Ford Focus 3 SPECIFIC in Black Pu Leather and Suede Effect | FULL SET Front + Rear | TÜV Certified
COMPATIBILITY:

- SPECIFIC for FORD FOCUS 3 (2011-2018) " ONLY With the Interior as per "PHOTO 2"

**Attention! Compatible ONLY with Trend-Trend X Version**

(Eligible for Reclining Seats, Seats with Integrated AIRBAG, Rear seats with central armrest, Folding or Partially Folding Rear Seats)


ASSEMBLY:

" For a correct installation it is strongly recommended to always contact an expert in the sector "
" Some Stages may be slightly different, from Car to Car "


1) INSTALLATION OF FRONT SEATS
- Tilt the Backrest
- Place the appropriate cover on the Seat, aligning it as best as possible
- Bring the Elastics behind the Seat, passing them between the Back and the Seat
- Tighten and Fix the Side Elastics of the Seat between the Side Plastics of the Seat with the Help of a Flat Tip Screwdriver (or a similar tool)
- Make sure the Cover is Aligned Correctly with the Seat
- Tighten the elastics previously brought behind the seat and fix them under the seat, using the special metal hooks supplied
- Tension The Front Elastic Bands Of The Seat And Fix Them Under The Seat, Using The Special Metal Hooks Provided
- Repeat the operation on the Second Seat

2) INSTALLATION OF THE FRONT BACKREST
- ATTENTION: If the car has airbags, Make sure that the "Airbag" label of the seat and the seat cover are on the same side (to understand the exact cover of the driver and passenger seat)
- Remove the headrests
- Insert the Seat Cover on the Backrest and align it in the best way
- Bring the elastics of the front part behind the seat, passing them between the backrest and the seat
- Stretch the elastic bands from the back of the seat by pulling the end of the seat cover to which they are anchored, to give it a perfect adherence
- Fix the Elastics under the Seat, using the Special Metal Hooks Provided
- Make an X-shaped cut with scissors in the holes of the headrests and bring out the Plastic Arrangements, pushing the cut part under the Arrangements themselves
- Repeat the operation on the Second Backrest

3) HEADREST INSTALLATION
- Reinstall the Headrests in the Seat
- Slide the Hooded Cover over the Headrest and Line it up

4) REAR SEAT INSTALLATION
- Remove the Rear Seat Cushion (most cars are set up to Release the Rear Seat)
- Insert the seat cover on the seat and align it in the best way
- Tension and Fix the Elastics in Opposite Way to each other under the Seat, using the Special Metal Hooks Provided, trying to keep them as parallel as possible
- For a perfect look it is necessary to always align each end of the seat cover with the seat itself (e.g. corner to corner, top edge to top edge)

5) REAR BACKREST INSTALLATION
- Remove the headrests
- Insert the hooded seat covers on the backrest, under the seat belts, and align them in the best way
- Lower the Backrest
- Insert the part underneath behind the seat, passing it between the backrest and the seat
- Join the 2 hook and loop closures behind the backrest and on the sides
- If the car is equipped with folding rear seats, lower the zip at the joint and partially fold the backrest
- For a perfect look it is necessary to always align each end of the seat cover with the seat itself (e.g. corner to corner, top edge to top edge)


(Although Simple and Intuitive, ASSEMBLY BY AN EXPERT IN THE SECTOR IS ALWAYS RECOMMENDED, TO AVOID POSSIBLE DAMAGE TO THINGS OR PEOPLE. WE ALWAYS RECOMMEND NOT DO IT YOURSELF)
€366.34 Regular Price €402.58
SEAT COVERS for VW Passat B6 SPECIFIC in Black Pu Leather and Suede Effect | FULL SET Front + Rear | TÜV Certified
COMPATIBILITY:

- SPECIFIC for VW PASSAT B6 (2005-2010) " ONLY With the Interior as per "PHOTO 2"


(Eligible for Reclining Seats, Seats with Integrated AIRBAG, Rear seats with central armrest, Folding or Partially Folding Rear Seats)


ASSEMBLY:

" For a correct installation it is strongly recommended to always contact an expert in the sector "
" Some Stages may be slightly different, from Car to Car "


1) INSTALLATION OF FRONT SEATS
- Tilt the Backrest
- Place the appropriate cover on the Seat, aligning it as best as possible
- Bring the Elastics behind the Seat, passing them between the Back and the Seat
- Tighten and Fix the Side Elastics of the Seat between the Side Plastics of the Seat with the Help of a Flat Tip Screwdriver (or a similar tool)
- Make sure the Cover is Aligned Correctly with the Seat
- Tighten the elastics previously brought behind the seat and fix them under the seat, using the special metal hooks supplied
- Tension The Front Elastic Bands Of The Seat And Fix Them Under The Seat, Using The Special Metal Hooks Provided
- Repeat the operation on the Second Seat

2) INSTALLATION OF THE FRONT BACKREST
- ATTENTION: If the car has airbags, Make sure that the "Airbag" label of the seat and the seat cover are on the same side (to understand the exact cover of the driver and passenger seat)
- Remove the headrests
- Insert the Seat Cover on the Backrest and align it in the best way
- Bring the elastics of the front part behind the seat, passing them between the backrest and the seat
- Stretch the elastic bands from the back of the seat by pulling the end of the seat cover to which they are anchored, to give it a perfect adherence
- Fix the Elastics under the Seat, using the Special Metal Hooks Provided
- Make an X-shaped cut with scissors in the holes of the headrests and bring out the Plastic Arrangements, pushing the cut part under the Arrangements themselves
- Repeat the operation on the Second Backrest

3) HEADREST INSTALLATION
- Reinstall the Headrests in the Seat
- Slide the Hooded Cover over the Headrest and Line it up

4) REAR SEAT INSTALLATION
- Remove the Rear Seat Cushion (most cars are set up to Release the Rear Seat)
- Insert the seat cover on the seat and align it in the best way
- Tension and Fix the Elastics in Opposite Way to each other under the Seat, using the Special Metal Hooks Provided, trying to keep them as parallel as possible
- For a perfect look it is necessary to always align each end of the seat cover with the seat itself (e.g. corner to corner, top edge to top edge)

5) REAR BACKREST INSTALLATION
- Remove the headrests
- Insert the hooded seat covers on the backrest, under the seat belts, and align them in the best way
- Lower the Backrest
- Insert the part underneath behind the seat, passing it between the backrest and the seat
- Join the 2 hook and loop closures behind the backrest and on the sides
- If the car is equipped with folding rear seats, lower the zip at the joint and partially fold the backrest
- For a perfect look it is necessary to always align each end of the seat cover with the seat itself (e.g. corner to corner, top edge to top edge)


(Although Simple and Intuitive, ASSEMBLY BY AN EXPERT IN THE SECTOR IS ALWAYS RECOMMENDED, TO AVOID POSSIBLE DAMAGE TO THINGS OR PEOPLE. WE ALWAYS RECOMMEND NOT DO IT YOURSELF)
€366.34 Regular Price €402.58
SEAT COVERS for VW Golf 8 SPECIFIC in Black Pu Leather and Grey Suede Effect | FULL SET Front + Rear | TÜV Certified
COMPATIBILITY:

- SPECIFIC for VW GOLF 8 (from 2019) " ONLY With the Interior as per "PHOTO 2"


(Eligible for Reclining Seats, Seats with Integrated AIRBAG, Rear seats with central armrest, Folding or Partially Folding Rear Seats)


ASSEMBLY:

" For a correct installation it is strongly recommended to always contact an expert in the sector "
" Some Stages may be slightly different, from Car to Car "


1) INSTALLATION OF FRONT SEATS
- Tilt the Backrest
- Place the appropriate cover on the Seat, aligning it as best as possible
- Bring the Elastics behind the Seat, passing them between the Back and the Seat
- Tighten and Fix the Side Elastics of the Seat between the Side Plastics of the Seat with the Help of a Flat Tip Screwdriver (or a similar tool)
- Make sure the Cover is Aligned Correctly with the Seat
- Tighten the elastics previously brought behind the seat and fix them under the seat, using the special metal hooks supplied
- Tension The Front Elastic Bands Of The Seat And Fix Them Under The Seat, Using The Special Metal Hooks Provided
- Repeat the operation on the Second Seat

2) INSTALLATION OF THE FRONT BACKREST
- ATTENTION: If the car has airbags, Make sure that the "Airbag" label of the seat and the seat cover are on the same side (to understand the exact cover of the driver and passenger seat)
- Remove the headrests
- Insert the Seat Cover on the Backrest and align it in the best way
- Bring the elastics of the front part behind the seat, passing them between the backrest and the seat
- Stretch the elastic bands from the back of the seat by pulling the end of the seat cover to which they are anchored, to give it a perfect adherence
- Fix the Elastics under the Seat, using the Special Metal Hooks Provided
- Make an X-shaped cut with scissors in the holes of the headrests and bring out the Plastic Arrangements, pushing the cut part under the Arrangements themselves
- Repeat the operation on the Second Backrest

3) HEADREST INSTALLATION
- Reinstall the Headrests in the Seat
- Slide the Hooded Cover over the Headrest and Line it up

4) REAR SEAT INSTALLATION
- Remove the Rear Seat Cushion (most cars are set up to Release the Rear Seat)
- Insert the seat cover on the seat and align it in the best way
- Tension and Fix the Elastics in Opposite Way to each other under the Seat, using the Special Metal Hooks Provided, trying to keep them as parallel as possible
- For a perfect look it is necessary to always align each end of the seat cover with the seat itself (e.g. corner to corner, top edge to top edge)

5) REAR BACKREST INSTALLATION
- Remove the headrests
- Insert the hooded seat covers on the backrest, under the seat belts, and align them in the best way
- Lower the Backrest
- Insert the part underneath behind the seat, passing it between the backrest and the seat
- Join the 2 hook and loop closures behind the backrest and on the sides
- If the car is equipped with folding rear seats, lower the zip at the joint and partially fold the backrest
- For a perfect look it is necessary to always align each end of the seat cover with the seat itself (e.g. corner to corner, top edge to top edge)


(Although Simple and Intuitive, ASSEMBLY BY AN EXPERT IN THE SECTOR IS ALWAYS RECOMMENDED, TO AVOID POSSIBLE DAMAGE TO THINGS OR PEOPLE. WE ALWAYS RECOMMEND NOT DO IT YOURSELF)
€366.34 Regular Price €402.58
SEAT COVERS for VW Tiguan 2 SPECIFIC in Black Pu Leather and Suede Effect | FULL SET Front + Rear | TÜV Certified
COMPATIBILITY:

- SPECIFIC for VW TIGUAN 2 (from 2016) " ONLY With the Interior as per "PHOTO 2"


(Eligible for Reclining Seats, Seats with Integrated AIRBAG, Rear seats with central armrest, Folding or Partially Folding Rear Seats)


ASSEMBLY:

" For a correct installation it is strongly recommended to always contact an expert in the sector "
" Some Stages may be slightly different, from Car to Car "


1) INSTALLATION OF FRONT SEATS
- Tilt the Backrest
- Place the appropriate cover on the Seat, aligning it as best as possible
- Bring the Elastics behind the Seat, passing them between the Back and the Seat
- Tighten and Fix the Side Elastics of the Seat between the Side Plastics of the Seat with the Help of a Flat Tip Screwdriver (or a similar tool)
- Make sure the Cover is Aligned Correctly with the Seat
- Tighten the elastics previously brought behind the seat and fix them under the seat, using the special metal hooks supplied
- Tension The Front Elastic Bands Of The Seat And Fix Them Under The Seat, Using The Special Metal Hooks Provided
- Repeat the operation on the Second Seat

2) INSTALLATION OF THE FRONT BACKREST
- ATTENTION: If the car has airbags, Make sure that the "Airbag" label of the seat and the seat cover are on the same side (to understand the exact cover of the driver and passenger seat)
- Remove the headrests
- Insert the Seat Cover on the Backrest and align it in the best way
- Bring the elastics of the front part behind the seat, passing them between the backrest and the seat
- Stretch the elastic bands from the back of the seat by pulling the end of the seat cover to which they are anchored, to give it a perfect adherence
- Fix the Elastics under the Seat, using the Special Metal Hooks Provided
- Make an X-shaped cut with scissors in the holes of the headrests and bring out the Plastic Arrangements, pushing the cut part under the Arrangements themselves
- Repeat the operation on the Second Backrest

3) HEADREST INSTALLATION
- Reinstall the Headrests in the Seat
- Slide the Hooded Cover over the Headrest and Line it up

4) REAR SEAT INSTALLATION
- Remove the Rear Seat Cushion (most cars are set up to Release the Rear Seat)
- Insert the seat cover on the seat and align it in the best way
- Tension and Fix the Elastics in Opposite Way to each other under the Seat, using the Special Metal Hooks Provided, trying to keep them as parallel as possible
- For a perfect look it is necessary to always align each end of the seat cover with the seat itself (e.g. corner to corner, top edge to top edge)

5) REAR BACKREST INSTALLATION
- Remove the headrests
- Insert the hooded seat covers on the backrest, under the seat belts, and align them in the best way
- Lower the Backrest
- Insert the part underneath behind the seat, passing it between the backrest and the seat
- Join the 2 hook and loop closures behind the backrest and on the sides
- If the car is equipped with folding rear seats, lower the zip at the joint and partially fold the backrest
- For a perfect look it is necessary to always align each end of the seat cover with the seat itself (e.g. corner to corner, top edge to top edge)


(Although Simple and Intuitive, ASSEMBLY BY AN EXPERT IN THE SECTOR IS ALWAYS RECOMMENDED, TO AVOID POSSIBLE DAMAGE TO THINGS OR PEOPLE. WE ALWAYS RECOMMEND NOT DO IT YOURSELF)
€366.34 Regular Price €402.58
SEAT COVERS for Dacia Sandero Stepway 2 SPECIFIC in Black Pu Leather and Suede Effect | FULL SET Front + Rear | TÜV Certified
COMPATIBILITY:

- SPECIFIC for DACIA SANDERO STEPWAY 2 (2012-2020) " ONLY With the Interior as per "PHOTO 2"

(Eligible for Reclining Seats, Seats with Integrated AIRBAG, Rear seats with central armrest, Folding or Partially Folding Rear Seats)


ASSEMBLY:

" For a correct installation it is strongly recommended to always contact an expert in the sector "
" Some Stages may be slightly different, from Car to Car "


1) INSTALLATION OF FRONT SEATS
- Tilt the Backrest
- Place the appropriate cover on the Seat, aligning it as best as possible
- Bring the Elastics behind the Seat, passing them between the Back and the Seat
- Tighten and Fix the Side Elastics of the Seat between the Side Plastics of the Seat with the Help of a Flat Tip Screwdriver (or a similar tool)
- Make sure the Cover is Aligned Correctly with the Seat
- Tighten the elastics previously brought behind the seat and fix them under the seat, using the special metal hooks supplied
- Tension The Front Elastic Bands Of The Seat And Fix Them Under The Seat, Using The Special Metal Hooks Provided
- Repeat the operation on the Second Seat

2) INSTALLATION OF THE FRONT BACKREST
- ATTENTION: If the car has airbags, Make sure that the "Airbag" label of the seat and the seat cover are on the same side (to understand the exact cover of the driver and passenger seat)
- Remove the headrests
- Insert the Seat Cover on the Backrest and align it in the best way
- Bring the elastics of the front part behind the seat, passing them between the backrest and the seat
- Stretch the elastic bands from the back of the seat by pulling the end of the seat cover to which they are anchored, to give it a perfect adherence
- Fix the Elastics under the Seat, using the Special Metal Hooks Provided
- Make an X-shaped cut with scissors in the holes of the headrests and bring out the Plastic Arrangements, pushing the cut part under the Arrangements themselves
- Repeat the operation on the Second Backrest

3) HEADREST INSTALLATION
- Reinstall the Headrests in the Seat
- Slide the Hooded Cover over the Headrest and Line it up

4) REAR SEAT INSTALLATION
- Remove the Rear Seat Cushion (most cars are set up to Release the Rear Seat)
- Insert the seat cover on the seat and align it in the best way
- Tension and Fix the Elastics in Opposite Way to each other under the Seat, using the Special Metal Hooks Provided, trying to keep them as parallel as possible
- For a perfect look it is necessary to always align each end of the seat cover with the seat itself (e.g. corner to corner, top edge to top edge)

5) REAR BACKREST INSTALLATION
- Remove the headrests
- Insert the hooded seat covers on the backrest, under the seat belts, and align them in the best way
- Lower the Backrest
- Insert the part underneath behind the seat, passing it between the backrest and the seat
- Join the 2 hook and loop closures behind the backrest and on the sides
- If the car is equipped with folding rear seats, lower the zip at the joint and partially fold the backrest
- For a perfect look it is necessary to always align each end of the seat cover with the seat itself (e.g. corner to corner, top edge to top edge)


(Although Simple and Intuitive, ASSEMBLY BY AN EXPERT IN THE SECTOR IS ALWAYS RECOMMENDED, TO AVOID POSSIBLE DAMAGE TO THINGS OR PEOPLE. WE ALWAYS RECOMMEND NOT DO IT YOURSELF)
€366.34 Regular Price €402.58
SEAT COVERS for Dacia Duster 2 SPECIFIC in Black Pu Leather and Suede Effect | FULL SET Front + Rear | TÜV Certified
COMPATIBILITY:

- SPECIFIC for DACIA DUSTER 2 (2018-2021) " ONLY With the Interior as per "PHOTO 2"

(Eligible for Reclining Seats, Seats with Integrated AIRBAG, Rear seats with central armrest, Folding or Partially Folding Rear Seats)


ASSEMBLY:

" For a correct installation it is strongly recommended to always contact an expert in the sector "
" Some Stages may be slightly different, from Car to Car "


1) INSTALLATION OF FRONT SEATS
- Tilt the Backrest
- Place the appropriate cover on the Seat, aligning it as best as possible
- Bring the Elastics behind the Seat, passing them between the Back and the Seat
- Tighten and Fix the Side Elastics of the Seat between the Side Plastics of the Seat with the Help of a Flat Tip Screwdriver (or a similar tool)
- Make sure the Cover is Aligned Correctly with the Seat
- Tighten the elastics previously brought behind the seat and fix them under the seat, using the special metal hooks supplied
- Tension The Front Elastic Bands Of The Seat And Fix Them Under The Seat, Using The Special Metal Hooks Provided
- Repeat the operation on the Second Seat

2) INSTALLATION OF THE FRONT BACKREST
- ATTENTION: If the car has airbags, Make sure that the "Airbag" label of the seat and the seat cover are on the same side (to understand the exact cover of the driver and passenger seat)
- Remove the headrests
- Insert the Seat Cover on the Backrest and align it in the best way
- Bring the elastics of the front part behind the seat, passing them between the backrest and the seat
- Stretch the elastic bands from the back of the seat by pulling the end of the seat cover to which they are anchored, to give it a perfect adherence
- Fix the Elastics under the Seat, using the Special Metal Hooks Provided
- Make an X-shaped cut with scissors in the holes of the headrests and bring out the Plastic Arrangements, pushing the cut part under the Arrangements themselves
- Repeat the operation on the Second Backrest

3) HEADREST INSTALLATION
- Reinstall the Headrests in the Seat
- Slide the Hooded Cover over the Headrest and Line it up

4) REAR SEAT INSTALLATION
- Remove the Rear Seat Cushion (most cars are set up to Release the Rear Seat)
- Insert the seat cover on the seat and align it in the best way
- Tension and Fix the Elastics in Opposite Way to each other under the Seat, using the Special Metal Hooks Provided, trying to keep them as parallel as possible
- For a perfect look it is necessary to always align each end of the seat cover with the seat itself (e.g. corner to corner, top edge to top edge)

5) REAR BACKREST INSTALLATION
- Remove the headrests
- Insert the hooded seat covers on the backrest, under the seat belts, and align them in the best way
- Lower the Backrest
- Insert the part underneath behind the seat, passing it between the backrest and the seat
- Join the 2 hook and loop closures behind the backrest and on the sides
- If the car is equipped with folding rear seats, lower the zip at the joint and partially fold the backrest
- For a perfect look it is necessary to always align each end of the seat cover with the seat itself (e.g. corner to corner, top edge to top edge)


(Although Simple and Intuitive, ASSEMBLY BY AN EXPERT IN THE SECTOR IS ALWAYS RECOMMENDED, TO AVOID POSSIBLE DAMAGE TO THINGS OR PEOPLE. WE ALWAYS RECOMMEND NOT DO IT YOURSELF)
€366.34 Regular Price €402.58
SEAT COVERS for Dacia Duster 1 14-17 SPECIFIC in Black Pu Leather and Suede Effect | FULL SET Front + Rear | TÜV Certified
COMPATIBILITY:

- SPECIFIC for DACIA DUSTER 1 (2014-2017) " ONLY With the Interior as per "PHOTO 2"

**Attention! Compatible ONLY with Sport Version**

(Eligible for Reclining Seats, Seats with Integrated AIRBAG, Rear seats with central armrest, Folding or Partially Folding Rear Seats)


ASSEMBLY:

" For a correct installation it is strongly recommended to always contact an expert in the sector "
" Some Stages may be slightly different, from Car to Car "


1) INSTALLATION OF FRONT SEATS
- Tilt the Backrest
- Place the appropriate cover on the Seat, aligning it as best as possible
- Bring the Elastics behind the Seat, passing them between the Back and the Seat
- Tighten and Fix the Side Elastics of the Seat between the Side Plastics of the Seat with the Help of a Flat Tip Screwdriver (or a similar tool)
- Make sure the Cover is Aligned Correctly with the Seat
- Tighten the elastics previously brought behind the seat and fix them under the seat, using the special metal hooks supplied
- Tension The Front Elastic Bands Of The Seat And Fix Them Under The Seat, Using The Special Metal Hooks Provided
- Repeat the operation on the Second Seat

2) INSTALLATION OF THE FRONT BACKREST
- ATTENTION: If the car has airbags, Make sure that the "Airbag" label of the seat and the seat cover are on the same side (to understand the exact cover of the driver and passenger seat)
- Remove the headrests
- Insert the Seat Cover on the Backrest and align it in the best way
- Bring the elastics of the front part behind the seat, passing them between the backrest and the seat
- Stretch the elastic bands from the back of the seat by pulling the end of the seat cover to which they are anchored, to give it a perfect adherence
- Fix the Elastics under the Seat, using the Special Metal Hooks Provided
- Make an X-shaped cut with scissors in the holes of the headrests and bring out the Plastic Arrangements, pushing the cut part under the Arrangements themselves
- Repeat the operation on the Second Backrest

3) HEADREST INSTALLATION
- Reinstall the Headrests in the Seat
- Slide the Hooded Cover over the Headrest and Line it up

4) REAR SEAT INSTALLATION
- Remove the Rear Seat Cushion (most cars are set up to Release the Rear Seat)
- Insert the seat cover on the seat and align it in the best way
- Tension and Fix the Elastics in Opposite Way to each other under the Seat, using the Special Metal Hooks Provided, trying to keep them as parallel as possible
- For a perfect look it is necessary to always align each end of the seat cover with the seat itself (e.g. corner to corner, top edge to top edge)

5) REAR BACKREST INSTALLATION
- Remove the headrests
- Insert the hooded seat covers on the backrest, under the seat belts, and align them in the best way
- Lower the Backrest
- Insert the part underneath behind the seat, passing it between the backrest and the seat
- Join the 2 hook and loop closures behind the backrest and on the sides
- If the car is equipped with folding rear seats, lower the zip at the joint and partially fold the backrest
- For a perfect look it is necessary to always align each end of the seat cover with the seat itself (e.g. corner to corner, top edge to top edge)


(Although Simple and Intuitive, ASSEMBLY BY AN EXPERT IN THE SECTOR IS ALWAYS RECOMMENDED, TO AVOID POSSIBLE DAMAGE TO THINGS OR PEOPLE. WE ALWAYS RECOMMEND NOT DO IT YOURSELF)
€366.34 Regular Price €402.58
SEAT COVERS for VW Golf 7 SPECIFIC in Black Pu Leather | FULL SET Front + Rear | TÜV Certified
COMPATIBILITY:

- SPECIFIC for VOLKSWAGEN GOLF 7 (2012-2019) " ONLY With the Interior as per "PHOTO 2"

(Eligible for Reclining Seats, Seats with Integrated AIRBAG, Rear seats with central armrest, Folding or Partially Folding Rear Seats)


ASSEMBLY:

" For a correct installation it is strongly recommended to always contact an expert in the sector "
" Some Stages may be slightly different, from Car to Car "


1) INSTALLATION OF FRONT SEATS
- Tilt the Backrest
- Place the appropriate cover on the Seat, aligning it as best as possible
- Bring the Elastics behind the Seat, passing them between the Back and the Seat
- Tighten and Fix the Side Elastics of the Seat between the Side Plastics of the Seat with the Help of a Flat Tip Screwdriver (or a similar tool)
- Make sure the Cover is Aligned Correctly with the Seat
- Tighten the elastics previously brought behind the seat and fix them under the seat, using the special metal hooks supplied
- Tension The Front Elastic Bands Of The Seat And Fix Them Under The Seat, Using The Special Metal Hooks Provided
- Repeat the operation on the Second Seat

2) INSTALLATION OF THE FRONT BACKREST
- ATTENTION: If the car has airbags, Make sure that the "Airbag" label of the seat and the seat cover are on the same side (to understand the exact cover of the driver and passenger seat)
- Remove the headrests
- Insert the Seat Cover on the Backrest and align it in the best way
- Bring the elastics of the front part behind the seat, passing them between the backrest and the seat
- Stretch the elastic bands from the back of the seat by pulling the end of the seat cover to which they are anchored, to give it a perfect adherence
- Fix the Elastics under the Seat, using the Special Metal Hooks Provided
- Make an X-shaped cut with scissors in the holes of the headrests and bring out the Plastic Arrangements, pushing the cut part under the Arrangements themselves
- Repeat the operation on the Second Backrest

3) HEADREST INSTALLATION
- Reinstall the Headrests in the Seat
- Slide the Hooded Cover over the Headrest and Line it up

4) REAR SEAT INSTALLATION
- Remove the Rear Seat Cushion (most cars are set up to Release the Rear Seat)
- Insert the seat cover on the seat and align it in the best way
- Tension and Fix the Elastics in Opposite Way to each other under the Seat, using the Special Metal Hooks Provided, trying to keep them as parallel as possible
- For a perfect look it is necessary to always align each end of the seat cover with the seat itself (e.g. corner to corner, top edge to top edge)

5) REAR BACKREST INSTALLATION
- Remove the headrests
- Insert the seat cover on the backrest, under the seat belts, and align it in the best way
- Lower the Backrest
- Bring the elastics of the front part behind the seat, passing them between the backrest and the seat
- Stretch and Fix the Elastics in Opposite Way Behind the Back, using the Special Metal Hooks Provided, trying to keep them as parallel as possible
- If the car is equipped with folding rear seats, lower the zip at the joint and partially fold the backrest
- By lowering the backrest, you will have access to the unfinished side: add the side covers by closing the zip on both unfinished sides
(Attention: The two Side Covers Are Attached to each other by an Elastic; if necessary, detach them with a cut)
- Tighten and Fix the Elastics of the Side Covers Behind the Back, using the Special Metal Hooks Provided
- For a perfect look it is necessary to always align each end of the seat cover with the seat itself (e.g. corner to corner, top edge to top edge)


(Although Simple and Intuitive, ASSEMBLY BY AN EXPERT IN THE SECTOR IS ALWAYS RECOMMENDED, TO AVOID POSSIBLE DAMAGE TO THINGS OR PEOPLE. WE ALWAYS RECOMMEND NOT DO IT YOURSELF)
€366.34 Regular Price €402.58
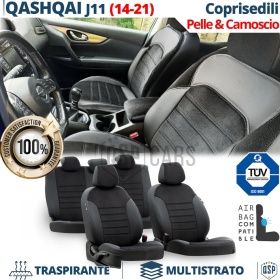
SEAT COVERS for Nissan Qashqai J11 SPECIFIC in Black Pu Leather and Suede Effect | FULL SET Front + Rear | TÜV Certified
COMPATIBILITY:

- SPECIFIC for NISSAN QASHQAI J11 (2014-2021) " ONLY With the Interior as per "PHOTO 2"


(Eligible for Reclining Seats, Seats with Integrated AIRBAG, Rear seats with central armrest, Folding or Partially Folding Rear Seats)


ASSEMBLY:

" For a correct installation it is strongly recommended to always contact an expert in the sector "
" Some Stages may be slightly different, from Car to Car "


1) INSTALLATION OF FRONT SEATS
- Tilt the Backrest
- Place the appropriate cover on the Seat, aligning it as best as possible
- Bring the Elastics behind the Seat, passing them between the Back and the Seat
- Tighten and Fix the Side Elastics of the Seat between the Side Plastics of the Seat with the Help of a Flat Tip Screwdriver (or a similar tool)
- Make sure the Cover is Aligned Correctly with the Seat
- Tighten the elastics previously brought behind the seat and fix them under the seat, using the special metal hooks supplied
- Tension The Front Elastic Bands Of The Seat And Fix Them Under The Seat, Using The Special Metal Hooks Provided
- Repeat the operation on the Second Seat

2) INSTALLATION OF THE FRONT BACKREST
- ATTENTION: If the car has airbags, Make sure that the "Airbag" label of the seat and the seat cover are on the same side (to understand the exact cover of the driver and passenger seat)
- Remove the headrests
- Insert the Seat Cover on the Backrest and align it in the best way
- Bring the elastics of the front part behind the seat, passing them between the backrest and the seat
- Stretch the elastic bands from the back of the seat by pulling the end of the seat cover to which they are anchored, to give it a perfect adherence
- Fix the Elastics under the Seat, using the Special Metal Hooks Provided
- Make an X-shaped cut with scissors in the holes of the headrests and bring out the Plastic Arrangements, pushing the cut part under the Arrangements themselves
- Repeat the operation on the Second Backrest

3) HEADREST INSTALLATION
- Reinstall the Headrests in the Seat
- Slide the Hooded Cover over the Headrest and Line it up

4) REAR SEAT INSTALLATION
- Remove the Rear Seat Cushion (most cars are set up to Release the Rear Seat)
- Insert the seat cover on the seat and align it in the best way
- Tension and Fix the Elastics in Opposite Way to each other under the Seat, using the Special Metal Hooks Provided, trying to keep them as parallel as possible
- For a perfect look it is necessary to always align each end of the seat cover with the seat itself (e.g. corner to corner, top edge to top edge)

5) REAR BACKREST INSTALLATION
- Remove the headrests
- Insert the hooded seat covers on the backrest, under the seat belts, and align them in the best way
- Lower the Backrest
- Insert the part underneath behind the seat, passing it between the backrest and the seat
- Join the 2 hook and loop closures behind the backrest and on the sides
- If the car is equipped with folding rear seats, lower the zip at the joint and partially fold the backrest
- For a perfect look it is necessary to always align each end of the seat cover with the seat itself (e.g. corner to corner, top edge to top edge)


(Although Simple and Intuitive, ASSEMBLY BY AN EXPERT IN THE SECTOR IS ALWAYS RECOMMENDED, TO AVOID POSSIBLE DAMAGE TO THINGS OR PEOPLE. WE ALWAYS RECOMMEND NOT DO IT YOURSELF)
€366.34 Regular Price €402.58
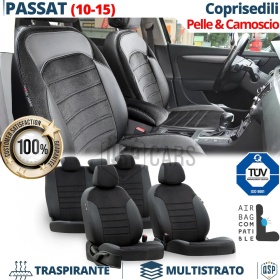
SEAT COVERS for VW Passat B7 SPECIFIC in Black Pu Leather and Suede Effect | FULL SET Front + Rear | TÜV Certified
COMPATIBILITY:

- SPECIFIC for VW PASSAT B7 (2010-2015) " ONLY With the Interior as per "PHOTO 2"


(Eligible for Reclining Seats, Seats with Integrated AIRBAG, Rear seats with central armrest, Folding or Partially Folding Rear Seats)


ASSEMBLY:

" For a correct installation it is strongly recommended to always contact an expert in the sector "
" Some Stages may be slightly different, from Car to Car "


1) INSTALLATION OF FRONT SEATS
- Tilt the Backrest
- Place the appropriate cover on the Seat, aligning it as best as possible
- Bring the Elastics behind the Seat, passing them between the Back and the Seat
- Tighten and Fix the Side Elastics of the Seat between the Side Plastics of the Seat with the Help of a Flat Tip Screwdriver (or a similar tool)
- Make sure the Cover is Aligned Correctly with the Seat
- Tighten the elastics previously brought behind the seat and fix them under the seat, using the special metal hooks supplied
- Tension The Front Elastic Bands Of The Seat And Fix Them Under The Seat, Using The Special Metal Hooks Provided
- Repeat the operation on the Second Seat

2) INSTALLATION OF THE FRONT BACKREST
- ATTENTION: If the car has airbags, Make sure that the "Airbag" label of the seat and the seat cover are on the same side (to understand the exact cover of the driver and passenger seat)
- Remove the headrests
- Insert the Seat Cover on the Backrest and align it in the best way
- Bring the elastics of the front part behind the seat, passing them between the backrest and the seat
- Stretch the elastic bands from the back of the seat by pulling the end of the seat cover to which they are anchored, to give it a perfect adherence
- Fix the Elastics under the Seat, using the Special Metal Hooks Provided
- Make an X-shaped cut with scissors in the holes of the headrests and bring out the Plastic Arrangements, pushing the cut part under the Arrangements themselves
- Repeat the operation on the Second Backrest

3) HEADREST INSTALLATION
- Reinstall the Headrests in the Seat
- Slide the Hooded Cover over the Headrest and Line it up

4) REAR SEAT INSTALLATION
- Remove the Rear Seat Cushion (most cars are set up to Release the Rear Seat)
- Insert the seat cover on the seat and align it in the best way
- Tension and Fix the Elastics in Opposite Way to each other under the Seat, using the Special Metal Hooks Provided, trying to keep them as parallel as possible
- For a perfect look it is necessary to always align each end of the seat cover with the seat itself (e.g. corner to corner, top edge to top edge)

5) REAR BACKREST INSTALLATION
- Remove the headrests
- Insert the hooded seat covers on the backrest, under the seat belts, and align them in the best way
- Lower the Backrest
- Insert the part underneath behind the seat, passing it between the backrest and the seat
- Join the 2 hook and loop closures behind the backrest and on the sides
- If the car is equipped with folding rear seats, lower the zip at the joint and partially fold the backrest
- For a perfect look it is necessary to always align each end of the seat cover with the seat itself (e.g. corner to corner, top edge to top edge)


(Although Simple and Intuitive, ASSEMBLY BY AN EXPERT IN THE SECTOR IS ALWAYS RECOMMENDED, TO AVOID POSSIBLE DAMAGE TO THINGS OR PEOPLE. WE ALWAYS RECOMMEND NOT DO IT YOURSELF)
€366.34 Regular Price €402.58
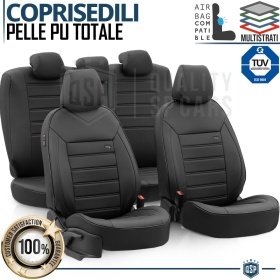
Universal Car SEAT COVERS in Pu Leather PERFECT FIT, FULL SET Front + Rear | TUV - AIRBAG SYSTEM
  • -5%
  • Out of Stock
Universal Car SEAT COVERS in Pu Leather PERFECT FIT, FULL SET Front + Rear | TUV - AIRBAG SYSTEM
COMPATIBILITY:

- Universal | Cars, SUVs, vans 5-Seater
- Reclining Seats
- Seats with Integrated AIRBAG
- Rear seats with central armrest
- Folding or Partially Folding Rear Seats


ASSEMBLY:

" For a correct installation it is strongly recommended to always contact an expert in the sector "
" Some Stages may be slightly different, from Car to Car "


1) INSTALLATION OF FRONT SEATS
- Tilt the Backrest
- Place the appropriate cover on the Seat, aligning it as best as possible
- Bring the Elastics behind the Seat, passing them between the Back and the Seat
- Tighten and Fix the Side Elastics of the Seat between the Side Plastics of the Seat with the Help of a Flat Tip Screwdriver (or a similar tool)
- Make sure the Cover is Aligned Correctly with the Seat
- Tighten the elastics previously brought behind the seat and fix them under the seat, using the special metal hooks supplied
- Tension The Front Elastic Bands Of The Seat And Fix Them Under The Seat, Using The Special Metal Hooks Provided
- Repeat the operation on the Second Seat

2) INSTALLATION OF THE FRONT BACKREST
- ATTENTION: Make sure that the "Airbag" label of the seat and the seat cover are on the same side (to understand the exact cover of the driver and passenger seat)
- Remove the headrests
- Insert the Seat Cover on the Backrest and align it in the best way
- Bring the elastics of the front part behind the seat, passing them between the backrest and the seat
- Stretch the elastic bands from the back of the seat by pulling the end of the seat cover to which they are anchored, to give it a perfect adherence
- Fix the Elastics under the Seat, using the Special Metal Hooks Provided
- Make an X-shaped cut with scissors in the holes of the headrests and bring out the Plastic Arrangements, pushing the cut part under the Arrangements themselves
- Repeat the operation on the Second Backrest

3) HEADREST INSTALLATION
- Reinstall the Headrests in the Seat
- Slide the Hooded Cover over the Headrest and Line it up

4) REAR SEAT INSTALLATION
- Remove the Rear Seat Cushion (most cars are set up to Release the Rear Seat)
- Insert the seat cover on the seat and align it in the best way
- Tension and Fix the Elastics in Opposite Way to each other under the Seat, using the Special Metal Hooks Provided, trying to keep them as parallel as possible
- For a perfect look it is necessary to always align each end of the seat cover with the seat itself (e.g. corner to corner, top edge to top edge)

5) REAR BACKREST INSTALLATION
- Remove the headrests
- Insert the seat cover on the backrest, under the seat belts, and align it in the best way
- Lower the Backrest
- Bring the elastics of the front part behind the seat, passing them between the backrest and the seat
- Stretch and Fix the Elastics in Opposite Way Behind the Back, using the Special Metal Hooks Provided, trying to keep them as parallel as possible
- If the car is equipped with folding rear seats, lower the zip at the joint and partially fold the backrest
- By lowering the backrest, you will have access to the unfinished side: add the side covers by closing the zip on both unfinished sides
(Attention: The two Side Covers Are Attached to each other by an Elastic; if necessary, detach them with a cut)
- Tighten and Fix the Elastics of the Side Covers Behind the Back, using the Special Metal Hooks Provided
- For a perfect look it is necessary to always align each end of the seat cover with the seat itself (e.g. corner to corner, top edge to top edge)


(Although Simple and Intuitive, ASSEMBLY BY AN EXPERT IN THE SECTOR IS ALWAYS RECOMMENDED, TO AVOID POSSIBLE DAMAGE TO THINGS OR PEOPLE. WE ALWAYS RECOMMEND NOT DO IT YOURSELF)
€220.08 Regular Price €231.67
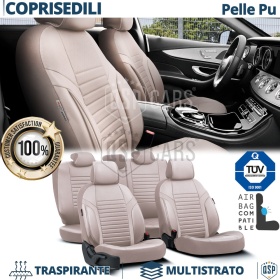
Universal Car SEAT COVERS in Beige Pu Leather PERFECT FIT, FULL SET Front + Rear | TÜV Certified

COMPATIBILITY:

- Universal | Cars, SUVs, vans 5-Seater
- Reclining Seats
- Seats with Integrated AIRBAG
- Rear seats with central armrest
- Folding or Partially Folding Rear Seats


ASSEMBLY:

" For a correct installation it is strongly recommended to always contact an expert in the sector "
" Some Stages may be slightly different, from Car to Car "


1) INSTALLATION OF FRONT SEATS
- Tilt the Backrest
- Place the appropriate cover on the Seat, aligning it as best as possible
- Bring the Elastics behind the Seat, passing them between the Back and the Seat
- Tighten and Fix the Side Elastics of the Seat between the Side Plastics of the Seat with the Help of a Flat Tip Screwdriver (or a similar tool)
- Make sure the Cover is Aligned Correctly with the Seat
- Tighten the elastics previously brought behind the seat and fix them under the seat, using the special metal hooks supplied
- Tension The Front Elastic Bands Of The Seat And Fix Them Under The Seat, Using The Special Metal Hooks Provided
- Repeat the operation on the Second Seat

2) INSTALLATION OF THE FRONT BACKREST
- ATTENTION: Make sure that the "Airbag" label of the seat and the seat cover are on the same side (to understand the exact cover of the driver and passenger seat)
- Remove the headrests
- Insert the Seat Cover on the Backrest and align it in the best way
- Bring the elastics of the front part behind the seat, passing them between the backrest and the seat
- Stretch the elastic bands from the back of the seat by pulling the end of the seat cover to which they are anchored, to give it a perfect adherence
- Fix the Elastics under the Seat, using the Special Metal Hooks Provided
- Make an X-shaped cut with scissors in the holes of the headrests and bring out the Plastic Arrangements, pushing the cut part under the Arrangements themselves
- Repeat the operation on the Second Backrest

3) HEADREST INSTALLATION
- Reinstall the Headrests in the Seat
- Slide the Hooded Cover over the Headrest and Line it up

4) REAR SEAT INSTALLATION
- Remove the Rear Seat Cushion (most cars are set up to Release the Rear Seat)
- Insert the seat cover on the seat and align it in the best way
- Tension and Fix the Elastics in Opposite Way to each other under the Seat, using the Special Metal Hooks Provided, trying to keep them as parallel as possible
- For a perfect look it is necessary to always align each end of the seat cover with the seat itself (e.g. corner to corner, top edge to top edge)

5) REAR BACKREST INSTALLATION
- Remove the headrests
- Insert the seat cover on the backrest, under the seat belts, and align it in the best way
- Lower the Backrest
- Bring the elastics of the front part behind the seat, passing them between the backrest and the seat
- Stretch and Fix the Elastics in Opposite Way Behind the Back, using the Special Metal Hooks Provided, trying to keep them as parallel as possible
- If the car is equipped with folding rear seats, lower the zip at the joint and partially fold the backrest
- By lowering the backrest, you will have access to the unfinished side: add the side covers by closing the zip on both unfinished sides
(Attention: The two Side Covers Are Attached to each other by an Elastic; if necessary, detach them with a cut)
- Tighten and Fix the Elastics of the Side Covers Behind the Back, using the Special Metal Hooks Provided
- For a perfect look it is necessary to always align each end of the seat cover with the seat itself (e.g. corner to corner, top edge to top edge)


(Although Simple and Intuitive, ASSEMBLY BY AN EXPERT IN THE SECTOR IS ALWAYS RECOMMENDED, TO AVOID POSSIBLE DAMAGE TO THINGS OR PEOPLE. WE ALWAYS RECOMMEND NOT DO IT YOURSELF)

€216.61 Regular Price €228.01
Universal Car SEAT COVERS Blue Pu Leather and Suede Effect, FULL SET Front + Rear | TUV - AIRBAG SYSTEM
  • -5%
  • Out of Stock
Universal Car SEAT COVERS Blue Pu Leather and Suede Effect, FULL SET Front + Rear | TUV - AIRBAG SYSTEM
COMPATIBILITY:

- Universal | Cars, SUVs, vans 5-Seater
- Reclining Seats
- Seats with Integrated AIRBAG
- Rear seats with central armrest
- Folding or Partially Folding Rear Seats


ASSEMBLY:

" For a correct installation it is strongly recommended to always contact an expert in the sector "
" Some Stages may be slightly different, from Car to Car "


1) INSTALLATION OF FRONT SEATS
- Tilt the Backrest
- Place the appropriate cover on the Seat, aligning it as best as possible
- Bring the Elastics behind the Seat, passing them between the Back and the Seat
- Tighten and Fix the Side Elastics of the Seat between the Side Plastics of the Seat with the Help of a Flat Tip Screwdriver (or a similar tool)
- Make sure the Cover is Aligned Correctly with the Seat
- Tighten the elastics previously brought behind the seat and fix them under the seat, using the special metal hooks supplied
- Tension The Front Elastic Bands Of The Seat And Fix Them Under The Seat, Using The Special Metal Hooks Provided
- Repeat the operation on the Second Seat

2) INSTALLATION OF THE FRONT BACKREST
- ATTENTION: Make sure that the "Airbag" label of the seat and the seat cover are on the same side (to understand the exact cover of the driver and passenger seat)
- Remove the headrests
- Insert the Seat Cover on the Backrest and align it in the best way
- Bring the elastics of the front part behind the seat, passing them between the backrest and the seat
- Stretch the elastic bands from the back of the seat by pulling the end of the seat cover to which they are anchored, to give it a perfect adherence
- Fix the Elastics under the Seat, using the Special Metal Hooks Provided
- Make an X-shaped cut with scissors in the holes of the headrests and bring out the Plastic Arrangements, pushing the cut part under the Arrangements themselves
- Repeat the operation on the Second Backrest

3) HEADREST INSTALLATION
- Reinstall the Headrests in the Seat
- Slide the Hooded Cover over the Headrest and Line it up

4) REAR SEAT INSTALLATION
- Remove the Rear Seat Cushion (most cars are set up to Release the Rear Seat)
- Insert the seat cover on the seat and align it in the best way
- Tension and Fix the Elastics in Opposite Way to each other under the Seat, using the Special Metal Hooks Provided, trying to keep them as parallel as possible
- For a perfect look it is necessary to always align each end of the seat cover with the seat itself (e.g. corner to corner, top edge to top edge)

5) REAR BACKREST INSTALLATION
- Remove the headrests
- Insert the seat cover on the backrest, under the seat belts, and align it in the best way
- Lower the Backrest
- Bring the elastics of the front part behind the seat, passing them between the backrest and the seat
- Stretch and Fix the Elastics in Opposite Way Behind the Back, using the Special Metal Hooks Provided, trying to keep them as parallel as possible
- If the car is equipped with folding rear seats, lower the zip at the joint and partially fold the backrest
- By lowering the backrest, you will have access to the unfinished side: add the side covers by closing the zip on both unfinished sides
(Attention: The two Side Covers Are Attached to each other by an Elastic; if necessary, detach them with a cut)
- Tighten and Fix the Elastics of the Side Covers Behind the Back, using the Special Metal Hooks Provided
- For a perfect look it is necessary to always align each end of the seat cover with the seat itself (e.g. corner to corner, top edge to top edge)


(Although Simple and Intuitive, ASSEMBLY BY AN EXPERT IN THE SECTOR IS ALWAYS RECOMMENDED, TO AVOID POSSIBLE DAMAGE TO THINGS OR PEOPLE. WE ALWAYS RECOMMEND NOT DO IT YOURSELF)
€183.10 Regular Price €192.74
Universal Car SEAT COVERS Red Pu Leather and Suede Effect, FULL SET Front + Rear | TUV - AIRBAG SYSTEM
COMPATIBILITY:

- Universal | Cars, SUVs, vans 5-Seater
- Reclining Seats
- Seats with Integrated AIRBAG
- Rear seats with central armrest
- Folding or Partially Folding Rear Seats


ASSEMBLY:

" For a correct installation it is strongly recommended to always contact an expert in the sector "
" Some Stages may be slightly different, from Car to Car "


1) INSTALLATION OF FRONT SEATS
- Tilt the Backrest
- Place the appropriate cover on the Seat, aligning it as best as possible
- Bring the Elastics behind the Seat, passing them between the Back and the Seat
- Tighten and Fix the Side Elastics of the Seat between the Side Plastics of the Seat with the Help of a Flat Tip Screwdriver (or a similar tool)
- Make sure the Cover is Aligned Correctly with the Seat
- Tighten the elastics previously brought behind the seat and fix them under the seat, using the special metal hooks supplied
- Tension The Front Elastic Bands Of The Seat And Fix Them Under The Seat, Using The Special Metal Hooks Provided
- Repeat the operation on the Second Seat

2) INSTALLATION OF THE FRONT BACKREST
- ATTENTION: Make sure that the "Airbag" label of the seat and the seat cover are on the same side (to understand the exact cover of the driver and passenger seat)
- Remove the headrests
- Insert the Seat Cover on the Backrest and align it in the best way
- Bring the elastics of the front part behind the seat, passing them between the backrest and the seat
- Stretch the elastic bands from the back of the seat by pulling the end of the seat cover to which they are anchored, to give it a perfect adherence
- Fix the Elastics under the Seat, using the Special Metal Hooks Provided
- Make an X-shaped cut with scissors in the holes of the headrests and bring out the Plastic Arrangements, pushing the cut part under the Arrangements themselves
- Repeat the operation on the Second Backrest

3) HEADREST INSTALLATION
- Reinstall the Headrests in the Seat
- Slide the Hooded Cover over the Headrest and Line it up

4) REAR SEAT INSTALLATION
- Remove the Rear Seat Cushion (most cars are set up to Release the Rear Seat)
- Insert the seat cover on the seat and align it in the best way
- Tension and Fix the Elastics in Opposite Way to each other under the Seat, using the Special Metal Hooks Provided, trying to keep them as parallel as possible
- For a perfect look it is necessary to always align each end of the seat cover with the seat itself (e.g. corner to corner, top edge to top edge)

5) REAR BACKREST INSTALLATION
- Remove the headrests
- Insert the seat cover on the backrest, under the seat belts, and align it in the best way
- Lower the Backrest
- Bring the elastics of the front part behind the seat, passing them between the backrest and the seat
- Stretch and Fix the Elastics in Opposite Way Behind the Back, using the Special Metal Hooks Provided, trying to keep them as parallel as possible
- If the car is equipped with folding rear seats, lower the zip at the joint and partially fold the backrest
- By lowering the backrest, you will have access to the unfinished side: add the side covers by closing the zip on both unfinished sides
(Attention: The two Side Covers Are Attached to each other by an Elastic; if necessary, detach them with a cut)
- Tighten and Fix the Elastics of the Side Covers Behind the Back, using the Special Metal Hooks Provided
- For a perfect look it is necessary to always align each end of the seat cover with the seat itself (e.g. corner to corner, top edge to top edge)


(Although Simple and Intuitive, ASSEMBLY BY AN EXPERT IN THE SECTOR IS ALWAYS RECOMMENDED, TO AVOID POSSIBLE DAMAGE TO THINGS OR PEOPLE. WE ALWAYS RECOMMEND NOT DO IT YOURSELF)
€183.10 Regular Price €192.74
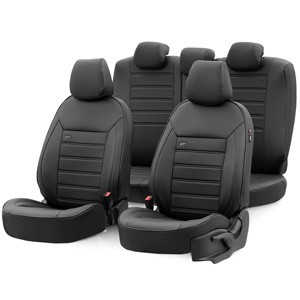
Universal Car SEAT COVERS Pu Leather and Suede Effect, FULL SET Front + Rear | TUV - AIRBAG SYSTEM
  • -5%
  • Out of Stock
Universal Car SEAT COVERS Pu Leather and Suede Effect, FULL SET Front + Rear | TUV - AIRBAG SYSTEM
COMPATIBILITY:

- Universal | Cars, SUVs, vans 5-Seater
- Reclining Seats
- Seats with Integrated AIRBAG
- Rear seats with central armrest
- Folding or Partially Folding Rear Seats


ASSEMBLY:

" For a correct installation it is strongly recommended to always contact an expert in the sector "
" Some Stages may be slightly different, from Car to Car "


1) INSTALLATION OF FRONT SEATS
- Tilt the Backrest
- Place the appropriate cover on the Seat, aligning it as best as possible
- Bring the Elastics behind the Seat, passing them between the Back and the Seat
- Tighten and Fix the Side Elastics of the Seat between the Side Plastics of the Seat with the Help of a Flat Tip Screwdriver (or a similar tool)
- Make sure the Cover is Aligned Correctly with the Seat
- Tighten the elastics previously brought behind the seat and fix them under the seat, using the special metal hooks supplied
- Tension The Front Elastic Bands Of The Seat And Fix Them Under The Seat, Using The Special Metal Hooks Provided
- Repeat the operation on the Second Seat

2) INSTALLATION OF THE FRONT BACKREST
- ATTENTION: Make sure that the "Airbag" label of the seat and the seat cover are on the same side (to understand the exact cover of the driver and passenger seat)
- Remove the headrests
- Insert the Seat Cover on the Backrest and align it in the best way
- Bring the elastics of the front part behind the seat, passing them between the backrest and the seat
- Stretch the elastic bands from the back of the seat by pulling the end of the seat cover to which they are anchored, to give it a perfect adherence
- Fix the Elastics under the Seat, using the Special Metal Hooks Provided
- Make an X-shaped cut with scissors in the holes of the headrests and bring out the Plastic Arrangements, pushing the cut part under the Arrangements themselves
- Repeat the operation on the Second Backrest

3) HEADREST INSTALLATION
- Reinstall the Headrests in the Seat
- Slide the Hooded Cover over the Headrest and Line it up

4) REAR SEAT INSTALLATION
- Remove the Rear Seat Cushion (most cars are set up to Release the Rear Seat)
- Insert the seat cover on the seat and align it in the best way
- Tension and Fix the Elastics in Opposite Way to each other under the Seat, using the Special Metal Hooks Provided, trying to keep them as parallel as possible
- For a perfect look it is necessary to always align each end of the seat cover with the seat itself (e.g. corner to corner, top edge to top edge)

5) REAR BACKREST INSTALLATION
- Remove the headrests
- Insert the seat cover on the backrest, under the seat belts, and align it in the best way
- Lower the Backrest
- Bring the elastics of the front part behind the seat, passing them between the backrest and the seat
- Stretch and Fix the Elastics in Opposite Way Behind the Back, using the Special Metal Hooks Provided, trying to keep them as parallel as possible
- If the car is equipped with folding rear seats, lower the zip at the joint and partially fold the backrest
- By lowering the backrest, you will have access to the unfinished side: add the side covers by closing the zip on both unfinished sides
(Attention: The two Side Covers Are Attached to each other by an Elastic; if necessary, detach them with a cut)
- Tighten and Fix the Elastics of the Side Covers Behind the Back, using the Special Metal Hooks Provided
- For a perfect look it is necessary to always align each end of the seat cover with the seat itself (e.g. corner to corner, top edge to top edge)


(Although Simple and Intuitive, ASSEMBLY BY AN EXPERT IN THE SECTOR IS ALWAYS RECOMMENDED, TO AVOID POSSIBLE DAMAGE TO THINGS OR PEOPLE. WE ALWAYS RECOMMEND NOT DO IT YOURSELF)
€183.10 Regular Price €192.74
Universal Car SEAT COVERS FULL SET OtoM GTI Sports in Pu Leather and Red Checkered Fabric | TUV - AIRBAG SYSTEM
COMPATIBILITY:

- Universal | Cars, SUVs, vans 5-Seater
- Reclining Seats
- Seats with Integrated AIRBAG
- Rear seats with central armrest
- Folding or Partially Folding Rear Seats


ASSEMBLY:

" For a correct installation it is strongly recommended to always contact an expert in the sector "
" Some Stages may be slightly different, from Car to Car "


1) INSTALLATION OF FRONT SEATS
- Tilt the Backrest
- Place the appropriate cover on the Seat, aligning it as best as possible
- Bring the Elastics behind the Seat, passing them between the Back and the Seat
- Tighten and Fix the Side Elastics of the Seat between the Side Plastics of the Seat with the Help of a Flat Tip Screwdriver (or a similar tool)
- Make sure the Cover is Aligned Correctly with the Seat
- Tighten the elastics previously brought behind the seat and fix them under the seat, using the special metal hooks supplied
- Tension The Front Elastic Bands Of The Seat And Fix Them Under The Seat, Using The Special Metal Hooks Provided
- Repeat the operation on the Second Seat

2) INSTALLATION OF THE FRONT BACKREST
- ATTENTION: Make sure that the "Airbag" label of the seat and the seat cover are on the same side (to understand the exact cover of the driver and passenger seat)
- Remove the headrests
- Insert the Seat Cover on the Backrest and align it in the best way
- Bring the elastics of the front part behind the seat, passing them between the backrest and the seat
- Stretch the elastic bands from the back of the seat by pulling the end of the seat cover to which they are anchored, to give it a perfect adherence
- Fix the Elastics under the Seat, using the Special Metal Hooks Provided
- Make an X-shaped cut with scissors in the holes of the headrests and bring out the Plastic Arrangements, pushing the cut part under the Arrangements themselves
- Repeat the operation on the Second Backrest

3) HEADREST INSTALLATION
- Reinstall the Headrests in the Seat
- Slide the Hooded Cover over the Headrest and Line it up

4) REAR SEAT INSTALLATION
- Remove the Rear Seat Cushion (most cars are set up to Release the Rear Seat)
- Insert the seat cover on the seat and align it in the best way
- Tension and Fix the Elastics in Opposite Way to each other under the Seat, using the Special Metal Hooks Provided, trying to keep them as parallel as possible
- For a perfect look it is necessary to always align each end of the seat cover with the seat itself (e.g. corner to corner, top edge to top edge)

5) REAR BACKREST INSTALLATION
- Remove the headrests
- Insert the seat cover on the backrest, under the seat belts, and align it in the best way
- Lower the Backrest
- Bring the elastics of the front part behind the seat, passing them between the backrest and the seat
- Stretch and Fix the Elastics in Opposite Way Behind the Back, using the Special Metal Hooks Provided, trying to keep them as parallel as possible
- If the car is equipped with folding rear seats, lower the zip at the joint and partially fold the backrest
- By lowering the backrest, you will have access to the unfinished side: add the side covers by closing the zip on both unfinished sides
(Attention: The two Side Covers Are Attached to each other by an Elastic; if necessary, detach them with a cut)
- Tighten and Fix the Elastics of the Side Covers Behind the Back, using the Special Metal Hooks Provided
- For a perfect look it is necessary to always align each end of the seat cover with the seat itself (e.g. corner to corner, top edge to top edge)


(Although Simple and Intuitive, ASSEMBLY BY AN EXPERT IN THE SECTOR IS ALWAYS RECOMMENDED, TO AVOID POSSIBLE DAMAGE TO THINGS OR PEOPLE. WE ALWAYS RECOMMEND NOT DO IT YOURSELF)
€165.48 Regular Price €174.19
Universal Car SEAT COVERS FULL SET OtoM GTI Sports in Pu Leather and Checkered Fabric | TUV - AIRBAG SYSTEM
COMPATIBILITY:

- Universal | Cars, SUVs, vans 5-Seater
- Reclining Seats
- Seats with Integrated AIRBAG
- Rear seats with central armrest
- Folding or Partially Folding Rear Seats


ASSEMBLY:

" For a correct installation it is strongly recommended to always contact an expert in the sector "
" Some Stages may be slightly different, from Car to Car "


1) INSTALLATION OF FRONT SEATS
- Tilt the Backrest
- Place the appropriate cover on the Seat, aligning it as best as possible
- Bring the Elastics behind the Seat, passing them between the Back and the Seat
- Tighten and Fix the Side Elastics of the Seat between the Side Plastics of the Seat with the Help of a Flat Tip Screwdriver (or a similar tool)
- Make sure the Cover is Aligned Correctly with the Seat
- Tighten the elastics previously brought behind the seat and fix them under the seat, using the special metal hooks supplied
- Tension The Front Elastic Bands Of The Seat And Fix Them Under The Seat, Using The Special Metal Hooks Provided
- Repeat the operation on the Second Seat

2) INSTALLATION OF THE FRONT BACKREST
- ATTENTION: Make sure that the "Airbag" label of the seat and the seat cover are on the same side (to understand the exact cover of the driver and passenger seat)
- Remove the headrests
- Insert the Seat Cover on the Backrest and align it in the best way
- Bring the elastics of the front part behind the seat, passing them between the backrest and the seat
- Stretch the elastic bands from the back of the seat by pulling the end of the seat cover to which they are anchored, to give it a perfect adherence
- Fix the Elastics under the Seat, using the Special Metal Hooks Provided
- Make an X-shaped cut with scissors in the holes of the headrests and bring out the Plastic Arrangements, pushing the cut part under the Arrangements themselves
- Repeat the operation on the Second Backrest

3) HEADREST INSTALLATION
- Reinstall the Headrests in the Seat
- Slide the Hooded Cover over the Headrest and Line it up

4) REAR SEAT INSTALLATION
- Remove the Rear Seat Cushion (most cars are set up to Release the Rear Seat)
- Insert the seat cover on the seat and align it in the best way
- Tension and Fix the Elastics in Opposite Way to each other under the Seat, using the Special Metal Hooks Provided, trying to keep them as parallel as possible
- For a perfect look it is necessary to always align each end of the seat cover with the seat itself (e.g. corner to corner, top edge to top edge)

5) REAR BACKREST INSTALLATION
- Remove the headrests
- Insert the seat cover on the backrest, under the seat belts, and align it in the best way
- Lower the Backrest
- Bring the elastics of the front part behind the seat, passing them between the backrest and the seat
- Stretch and Fix the Elastics in Opposite Way Behind the Back, using the Special Metal Hooks Provided, trying to keep them as parallel as possible
- If the car is equipped with folding rear seats, lower the zip at the joint and partially fold the backrest
- By lowering the backrest, you will have access to the unfinished side: add the side covers by closing the zip on both unfinished sides
(Attention: The two Side Covers Are Attached to each other by an Elastic; if necessary, detach them with a cut)
- Tighten and Fix the Elastics of the Side Covers Behind the Back, using the Special Metal Hooks Provided
- For a perfect look it is necessary to always align each end of the seat cover with the seat itself (e.g. corner to corner, top edge to top edge)


(Although Simple and Intuitive, ASSEMBLY BY AN EXPERT IN THE SECTOR IS ALWAYS RECOMMENDED, TO AVOID POSSIBLE DAMAGE TO THINGS OR PEOPLE. WE ALWAYS RECOMMEND NOT DO IT YOURSELF)
€165.48 Regular Price €174.19
Car SEAT COVERS Universal PU LEATHER, Fabric, BLUE Seams | FULL SET Front + Rear | TÜV - AIRBAG SYSTEM
COMPATIBILITY:

- Universal | Cars, SUVs, vans 5-Seater
- Reclining Seats
- Seats with Integrated AIRBAG
- Rear seats with central armrest
- Folding or Partially Folding Rear Seats


ASSEMBLY:

" For a correct installation it is strongly recommended to always contact an expert in the sector "
" Some Stages may be slightly different, from Car to Car "


1) INSTALLATION OF FRONT SEATS
- Tilt the Backrest
- Place the appropriate cover on the Seat, aligning it as best as possible
- Bring the Elastics behind the Seat, passing them between the Back and the Seat
- Tighten and Fix the Side Elastics of the Seat between the Side Plastics of the Seat with the Help of a Flat Tip Screwdriver (or a similar tool)
- Make sure the Cover is Aligned Correctly with the Seat
- Tighten the elastics previously brought behind the seat and fix them under the seat, using the special metal hooks supplied
- Tension The Front Elastic Bands Of The Seat And Fix Them Under The Seat, Using The Special Metal Hooks Provided
- Repeat the operation on the Second Seat

2) INSTALLATION OF THE FRONT BACKREST
- ATTENTION: Make sure that the "Airbag" label of the seat and the seat cover are on the same side (to understand the exact cover of the driver and passenger seat)
- Remove the headrests
- Insert the Seat Cover on the Backrest and align it in the best way
- Bring the elastics of the front part behind the seat, passing them between the backrest and the seat
- Stretch the elastic bands from the back of the seat by pulling the end of the seat cover to which they are anchored, to give it a perfect adherence
- Fix the Elastics under the Seat, using the Special Metal Hooks Provided
- Make an X-shaped cut with scissors in the holes of the headrests and bring out the Plastic Arrangements, pushing the cut part under the Arrangements themselves
- Repeat the operation on the Second Backrest

3) HEADREST INSTALLATION
- Reinstall the Headrests in the Seat
- Slide the Hooded Cover over the Headrest and Line it up

4) REAR SEAT INSTALLATION
- Remove the Rear Seat Cushion (most cars are set up to Release the Rear Seat)
- Insert the seat cover on the seat and align it in the best way
- Tension and Fix the Elastics in Opposite Way to each other under the Seat, using the Special Metal Hooks Provided, trying to keep them as parallel as possible
- For a perfect look it is necessary to always align each end of the seat cover with the seat itself (e.g. corner to corner, top edge to top edge)

5) REAR BACKREST INSTALLATION
- Remove the headrests
- Insert the seat cover on the backrest, under the seat belts, and align it in the best way
- Lower the Backrest
- Bring the elastics of the front part behind the seat, passing them between the backrest and the seat
- Stretch and Fix the Elastics in Opposite Way Behind the Back, using the Special Metal Hooks Provided, trying to keep them as parallel as possible
- If the car is equipped with folding rear seats, lower the zip at the joint and partially fold the backrest
- By lowering the backrest, you will have access to the unfinished side: add the side covers by closing the zip on both unfinished sides
(Attention: The two Side Covers Are Attached to each other by an Elastic; if necessary, detach them with a cut)
- Tighten and Fix the Elastics of the Side Covers Behind the Back, using the Special Metal Hooks Provided
- For a perfect look it is necessary to always align each end of the seat cover with the seat itself (e.g. corner to corner, top edge to top edge)


(Although Simple and Intuitive, ASSEMBLY BY AN EXPERT IN THE SECTOR IS ALWAYS RECOMMENDED, TO AVOID POSSIBLE DAMAGE TO THINGS OR PEOPLE. WE ALWAYS RECOMMEND NOT DO IT YOURSELF)
€160.78 Regular Price €169.24
Car SEAT COVERS Universal PU LEATHER, Fabric, RED Seams | FULL SET Front + Rear | TÜV - AIRBAG SYSTEM
  • -5%
  • Out of Stock
Car SEAT COVERS Universal PU LEATHER, Fabric, RED Seams | FULL SET Front + Rear | TÜV - AIRBAG SYSTEM
COMPATIBILITY:

- Universal | Cars, SUVs, vans 5-Seater
- Reclining Seats
- Seats with Integrated AIRBAG
- Rear seats with central armrest
- Folding or Partially Folding Rear Seats


ASSEMBLY:

" For a correct installation it is strongly recommended to always contact an expert in the sector "
" Some Stages may be slightly different, from Car to Car "


1) INSTALLATION OF FRONT SEATS
- Tilt the Backrest
- Place the appropriate cover on the Seat, aligning it as best as possible
- Bring the Elastics behind the Seat, passing them between the Back and the Seat
- Tighten and Fix the Side Elastics of the Seat between the Side Plastics of the Seat with the Help of a Flat Tip Screwdriver (or a similar tool)
- Make sure the Cover is Aligned Correctly with the Seat
- Tighten the elastics previously brought behind the seat and fix them under the seat, using the special metal hooks supplied
- Tension The Front Elastic Bands Of The Seat And Fix Them Under The Seat, Using The Special Metal Hooks Provided
- Repeat the operation on the Second Seat

2) INSTALLATION OF THE FRONT BACKREST
- ATTENTION: Make sure that the "Airbag" label of the seat and the seat cover are on the same side (to understand the exact cover of the driver and passenger seat)
- Remove the headrests
- Insert the Seat Cover on the Backrest and align it in the best way
- Bring the elastics of the front part behind the seat, passing them between the backrest and the seat
- Stretch the elastic bands from the back of the seat by pulling the end of the seat cover to which they are anchored, to give it a perfect adherence
- Fix the Elastics under the Seat, using the Special Metal Hooks Provided
- Make an X-shaped cut with scissors in the holes of the headrests and bring out the Plastic Arrangements, pushing the cut part under the Arrangements themselves
- Repeat the operation on the Second Backrest

3) HEADREST INSTALLATION
- Reinstall the Headrests in the Seat
- Slide the Hooded Cover over the Headrest and Line it up

4) REAR SEAT INSTALLATION
- Remove the Rear Seat Cushion (most cars are set up to Release the Rear Seat)
- Insert the seat cover on the seat and align it in the best way
- Tension and Fix the Elastics in Opposite Way to each other under the Seat, using the Special Metal Hooks Provided, trying to keep them as parallel as possible
- For a perfect look it is necessary to always align each end of the seat cover with the seat itself (e.g. corner to corner, top edge to top edge)

5) REAR BACKREST INSTALLATION
- Remove the headrests
- Insert the seat cover on the backrest, under the seat belts, and align it in the best way
- Lower the Backrest
- Bring the elastics of the front part behind the seat, passing them between the backrest and the seat
- Stretch and Fix the Elastics in Opposite Way Behind the Back, using the Special Metal Hooks Provided, trying to keep them as parallel as possible
- If the car is equipped with folding rear seats, lower the zip at the joint and partially fold the backrest
- By lowering the backrest, you will have access to the unfinished side: add the side covers by closing the zip on both unfinished sides
(Attention: The two Side Covers Are Attached to each other by an Elastic; if necessary, detach them with a cut)
- Tighten and Fix the Elastics of the Side Covers Behind the Back, using the Special Metal Hooks Provided
- For a perfect look it is necessary to always align each end of the seat cover with the seat itself (e.g. corner to corner, top edge to top edge)


(Although Simple and Intuitive, ASSEMBLY BY AN EXPERT IN THE SECTOR IS ALWAYS RECOMMENDED, TO AVOID POSSIBLE DAMAGE TO THINGS OR PEOPLE. WE ALWAYS RECOMMEND NOT DO IT YOURSELF)
€160.78 Regular Price €169.24
Car SEAT COVERS Universal PU LEATHER and Breathable Fabric, FULL SET Front + Rear | TÜV - AIRBAG SYSTEM
  • -5%
  • Out of Stock
Car SEAT COVERS Universal PU LEATHER and Breathable Fabric, FULL SET Front + Rear | TÜV - AIRBAG SYSTEM
COMPATIBILITY:

- Universal | Cars, SUVs, vans 5-Seater
- Reclining Seats
- Seats with Integrated AIRBAG
- Rear seats with central armrest
- Folding or Partially Folding Rear Seats


ASSEMBLY:

" For a correct installation it is strongly recommended to always contact an expert in the sector "
" Some Stages may be slightly different, from Car to Car "


1) INSTALLATION OF FRONT SEATS
- Tilt the Backrest
- Place the appropriate cover on the Seat, aligning it as best as possible
- Bring the Elastics behind the Seat, passing them between the Back and the Seat
- Tighten and Fix the Side Elastics of the Seat between the Side Plastics of the Seat with the Help of a Flat Tip Screwdriver (or a similar tool)
- Make sure the Cover is Aligned Correctly with the Seat
- Tighten the elastics previously brought behind the seat and fix them under the seat, using the special metal hooks supplied
- Tension The Front Elastic Bands Of The Seat And Fix Them Under The Seat, Using The Special Metal Hooks Provided
- Repeat the operation on the Second Seat

2) INSTALLATION OF THE FRONT BACKREST
- ATTENTION: Make sure that the "Airbag" label of the seat and the seat cover are on the same side (to understand the exact cover of the driver and passenger seat)
- Remove the headrests
- Insert the Seat Cover on the Backrest and align it in the best way
- Bring the elastics of the front part behind the seat, passing them between the backrest and the seat
- Stretch the elastic bands from the back of the seat by pulling the end of the seat cover to which they are anchored, to give it a perfect adherence
- Fix the Elastics under the Seat, using the Special Metal Hooks Provided
- Make an X-shaped cut with scissors in the holes of the headrests and bring out the Plastic Arrangements, pushing the cut part under the Arrangements themselves
- Repeat the operation on the Second Backrest

3) HEADREST INSTALLATION
- Reinstall the Headrests in the Seat
- Slide the Hooded Cover over the Headrest and Line it up

4) REAR SEAT INSTALLATION
- Remove the Rear Seat Cushion (most cars are set up to Release the Rear Seat)
- Insert the seat cover on the seat and align it in the best way
- Tension and Fix the Elastics in Opposite Way to each other under the Seat, using the Special Metal Hooks Provided, trying to keep them as parallel as possible
- For a perfect look it is necessary to always align each end of the seat cover with the seat itself (e.g. corner to corner, top edge to top edge)

5) REAR BACKREST INSTALLATION
- Remove the headrests
- Insert the seat cover on the backrest, under the seat belts, and align it in the best way
- Lower the Backrest
- Bring the elastics of the front part behind the seat, passing them between the backrest and the seat
- Stretch and Fix the Elastics in Opposite Way Behind the Back, using the Special Metal Hooks Provided, trying to keep them as parallel as possible
- If the car is equipped with folding rear seats, lower the zip at the joint and partially fold the backrest
- By lowering the backrest, you will have access to the unfinished side: add the side covers by closing the zip on both unfinished sides
(Attention: The two Side Covers Are Attached to each other by an Elastic; if necessary, detach them with a cut)
- Tighten and Fix the Elastics of the Side Covers Behind the Back, using the Special Metal Hooks Provided
- For a perfect look it is necessary to always align each end of the seat cover with the seat itself (e.g. corner to corner, top edge to top edge)


(Although Simple and Intuitive, ASSEMBLY BY AN EXPERT IN THE SECTOR IS ALWAYS RECOMMENDED, TO AVOID POSSIBLE DAMAGE TO THINGS OR PEOPLE. WE ALWAYS RECOMMEND NOT DO IT YOURSELF)
€160.78 Regular Price €169.24
Car SEAT COVERS Universal FULL SET Front + Rear in Breathable Fabric and PU leather | TUV - AIRBAG SYSTEM
COMPATIBILITY:

- Universal | Cars, SUVs, vans 5-Seater
- Reclining Seats
- Seats with Integrated AIRBAG

NOT COMPATIBLE on Rear Seats with Central Armrest ( Impossible to Open )


ASSEMBLY:

" For a correct installation it is strongly recommended to always contact an expert in the sector "
" Some Stages may be slightly different, from Car to Car "


1) INSTALLATION OF FRONT SEATS
- Tilt the Backrest
- Place the appropriate cover on the Seat, aligning it as best as possible
- Bring the Elastics behind the Seat, passing them between the Back and the Seat
- Tighten and Fix the Side Elastics of the Seat between the Side Plastics of the Seat with the Help of a Flat Tip Screwdriver (or a similar tool)
- Make sure the Cover is Aligned Correctly with the Seat
- Tighten the elastics previously brought behind the seat and fix them under the seat, using the special metal hooks supplied
- Tension The Front Elastic Bands Of The Seat And Fix Them Under The Seat, Using The Special Metal Hooks Provided
- Repeat the operation on the Second Seat

2) INSTALLATION OF THE FRONT BACKREST
- ATTENTION: Make sure that the "Airbag" label of the seat and the seat cover are on the same side (to understand the exact cover of the driver and passenger seat)
- Remove the headrests
- Insert the Seat Cover on the Backrest and align it in the best way
- Bring the elastics of the front part behind the seat, passing them between the backrest and the seat
- Stretch the elastic bands from the back of the seat by pulling the end of the seat cover to which they are anchored, to give it a perfect adherence
- Fix the Elastics under the Seat, using the Special Metal Hooks Provided
- Make an X-shaped cut with scissors in the holes of the headrests and bring out the Plastic Arrangements, pushing the cut part under the Arrangements themselves
- Repeat the operation on the Second Backrest

3) HEADREST INSTALLATION
- Reinstall the Headrests in the Seat
- Slide the Hooded Cover over the Headrest and Line it up

4) REAR SEAT INSTALLATION
- Remove the Rear Seat Cushion (most cars are set up to Release the Rear Seat)
- Insert the seat cover on the seat and align it in the best way
- Tension and Fix the Elastics in Opposite Way to each other under the Seat, using the Special Metal Hooks Provided, trying to keep them as parallel as possible
- For a perfect look it is necessary to always align each end of the seat cover with the seat itself (e.g. corner to corner, top edge to top edge)

5) REAR BACKREST INSTALLATION
- Remove the headrests
- Insert the seat cover on the backrest, under the seat belts, and align it in the best way
- Lower the Backrest
- Bring the elastics of the front part behind the seat, passing them between the backrest and the seat
- Stretch and Fix the Elastics in Opposite Way Behind the Back, using the Special Metal Hooks Provided, trying to keep them as parallel as possible
- For a perfect look it is necessary to always align each end of the seat cover with the seat itself (e.g. corner to corner, top edge to top edge)


(Although Simple and Intuitive, ASSEMBLY BY AN EXPERT IN THE SECTOR IS ALWAYS RECOMMENDED, TO AVOID POSSIBLE DAMAGE TO THINGS OR PEOPLE. WE ALWAYS RECOMMEND NOT DO IT YOURSELF)
€144.85 Regular Price €152.48
Car SEAT COVERS Universal FULL SET Front + Rear in Breathable Fabric | TUV - AIRBAG SYSTEM
COMPATIBILITY:

- Universal | Cars, SUVs, vans 5-Seater
- Reclining Seats
- Seats with Integrated AIRBAG

- NOT COMPATIBLE With Cars with Central Rear Armrest


ASSEMBLY:

" For a correct installation it is strongly recommended to always contact an expert in the sector "
" Some Stages may be slightly different, from Car to Car "


1) INSTALLATION OF FRONT SEATS
- Tilt the Backrest
- Place the appropriate cover on the Seat, aligning it as best as possible
- Bring the Elastics behind the Seat, passing them between the Back and the Seat
- Tighten and Fix the Side Elastics of the Seat between the Side Plastics of the Seat with the Help of a Flat Tip Screwdriver (or a similar tool)
- Make sure the Cover is Aligned Correctly with the Seat
- Tighten the elastics previously brought behind the seat and fix them under the seat, using the special metal hooks supplied
- Tension The Front Elastic Bands Of The Seat And Fix Them Under The Seat, Using The Special Metal Hooks Provided
- Repeat the operation on the Second Seat

2) INSTALLATION OF THE FRONT BACKREST
- ATTENTION: Make sure that the "Airbag" label of the seat and the seat cover are on the same side (to understand the exact cover of the driver and passenger seat)
- Remove the headrests
- Insert the Seat Cover on the Backrest and align it in the best way
- Bring the elastics of the front part behind the seat, passing them between the backrest and the seat
- Stretch the elastic bands from the back of the seat by pulling the end of the seat cover to which they are anchored, to give it a perfect adherence
- Fix the Elastics under the Seat, using the Special Metal Hooks Provided
- Make an X-shaped cut with scissors in the holes of the headrests and bring out the Plastic Arrangements, pushing the cut part under the Arrangements themselves
- Repeat the operation on the Second Backrest

3) HEADREST INSTALLATION
- Reinstall the Headrests in the Seat
- Slide the Hooded Cover over the Headrest and Line it up

4) REAR SEAT INSTALLATION
- Remove the Rear Seat Cushion (most cars are set up to Release the Rear Seat)
- Insert the seat cover on the seat and align it in the best way
- Tension and Fix the Elastics in Opposite Way to each other under the Seat, using the Special Metal Hooks Provided, trying to keep them as parallel as possible
- For a perfect look it is necessary to always align each end of the seat cover with the seat itself (e.g. corner to corner, top edge to top edge)

5) REAR BACKREST INSTALLATION
- Remove the headrests
- Insert the seat cover on the backrest, under the seat belts, and align it in the best way
- Lower the Backrest
- Bring the elastics of the front part behind the seat, passing them between the backrest and the seat
- Stretch and Fix the Elastics in Opposite Way Behind the Back, using the Special Metal Hooks Provided, trying to keep them as parallel as possible
- For a perfect look it is necessary to always align each end of the seat cover with the seat itself (e.g. corner to corner, top edge to top edge)


(Although Simple and Intuitive, ASSEMBLY BY AN EXPERT IN THE SECTOR IS ALWAYS RECOMMENDED, TO AVOID POSSIBLE DAMAGE TO THINGS OR PEOPLE. WE ALWAYS RECOMMEND NOT DO IT YOURSELF)
€113.47 Regular Price €119.44
Car SEAT COVER Universal ANTI SWEAT in Black Breathable Fabric | Front Seat, Professional Use
  • -5%
  • Out of Stock
Car SEAT COVER Universal ANTI SWEAT in Black Breathable Fabric | Front Seat, Professional Use
COMPATIBILITY:

- Universal | Cars, SUVs, Vans
- Reclining Seats
- Seats with Integrated AIRBAG


INSTALLATION:

- Remove the headrest, pulling it out completely
- Position the appropriate cover on the Seat, aligning it as best as possible
- Bring the central elastic behind the seat, inserting it on the backrest and making it go down to the height of the seat
- Insert the headrest again making it go through the holes in the seat cover
- Bring the rear elastic of the seat behind the seat, inserting it between the back and the seat
- Behind the seat, stretch the elastic just passed between the back and the seat and fix it under the seat with the hooks present on the front elastic of the seat
- Make sure the Cover is Aligned Correctly with the Seat
- Position the cover for the headrest and hook it vertically to the rear with the hook and the elastic on it.


(Although Simple and Intuitive, ASSEMBLY BY AN EXPERT IN THE SECTOR IS ALWAYS RECOMMENDED, TO AVOID POSSIBLE DAMAGE TO THINGS OR PEOPLE. WE ALWAYS RECOMMEND NOT DO IT YOURSELF)
€45.18 Regular Price €47.56
Negozio Consigliato ed Affidabile, inoltre questo era proprio il prodotto che cercavo
6 Professionelle Kunststoff Demontage Hebelwerkzeug Satz | Plastik Hebelwerkzeug Lösehebel

Ho recentemente acquistato questo prodotto e ne sono rimasto estremamente soddisfatto. La qualità dei materiali è eccellente e la funzionalità supera le mie aspettative. La consegna è stata puntuale e l'imballaggio impeccabile. Consiglio vivamente questo prodotto.


comment Merchant reply

Grazie per la tua recensione, ti aspettiamo per il prossimo acquisto


By Lisa C. the 2025-08-26 - 6 Professionelle.. This review was helpful 0 - 0 You've already voted
Report an abuse