
- -5%
- New
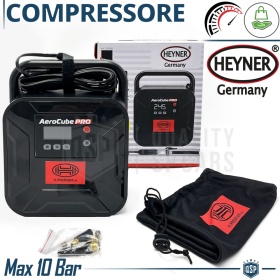
Mini Portable Car COMPRESSOR PROFESSIONAL Heyner GERMANY |...
COMPATIBILITY:
- Vehicles, Motorcycles, SUVs, Bikes, Trucks, Camping, Inflatable Devices (Inflatable Boats, balls, etc...)
- 12V Power Supply
- Pressure up to 10 bar / 150 psi
- Standard and Non-Standard Valves (4 Adapters Supplied)
USE:
(Illustrated Instructions Supplied)
- Position the Vehicle on an Absolutely Flat Surface
- Engage the parking brake
- Start the Vehicle Engine
- Connect the Cigarette Lighter Socket to the Vehicle (12V ONLY)
- Connect the Inflation Hose to the Valve of the Wheel or Device you want to inflate
- Press the "R" button to set the desired pressure by increasing or decreasing the value with the "+" or "-" button
- Wait 3 Seconds from Preset Setting
- Start the compressor, the compressor will stop at the preset pressure which will remain in memory
- For the next inflations it will only be necessary to start the compressor
- In dark situations, press the torch button to turn on the built-in LED torch
Although simple and intuitive FOR AN OPTIMAL FITTING, WE ALWAYS RECOMMEND THE INSTALLATION OF OUR ITEMS BY AN EXPERT
As we will not assume responsibility for the article assembled and subsequently detached.
We trust in your common sense.
€56.98
Regular Price
€59.98